- Introduction to Noem AI’s Custom Chatbots
- Key Features of Noem AI Chatbots
- Step-by-Step Guide: Creating a Custom Chatbot
- Build and Deploy Your AI Chatbot Today
Introduction to Noem AI’s Custom Chatbots #
Noem AI allows businesses to create fully customized AI-powered chatbots without any coding knowledge. Whether you need a chatbot for customer support, sales, or education, Noem AI provides an intuitive, no-code platform to build, customize, and deploy chatbots tailored to your business needs.
Key Features of Noem AI Chatbots #
- No Coding Required – Easily set up and train your chatbot with custom instructions.
- Pre-Built Templates – Choose from three chatbot types:
- Customer Support – Handle inquiries, FAQs, and issue resolution.
- Sales Representative – Assist customers with product recommendations and lead generation.
- Education Tutor – Provide learning assistance, explanations, and interactive education.
- Custom Instructions – Define the chatbot’s role, behavior, and responses to match your business needs. Now includes support for:
- Emailing
- Zendesk (Free Plan)
- Shopify (Individual Plan required for advanced features)
- File Creation
- API Calling
- Trigger Browser Events
- Chat Thread Functions

Important: Advanced functions will not work properly when deployed as a public chatbot. Make sure you only turn on the advanced functions if this AI will be used as a custom Agent in Noem AI.
- Website & Platform Integration – Deploy your chatbot on your website, WordPress, Wix, SquareSpace, WhatsApp, Slack, Shopify, and more.
- Customization Options – Custom colors, icons, and the ability to hide “Powered By” branding require at least an Individual Plan.
Step-by-Step Guide: Creating a Custom Chatbot #
Step 1: Access the Custom Chatbot Creation Tool #
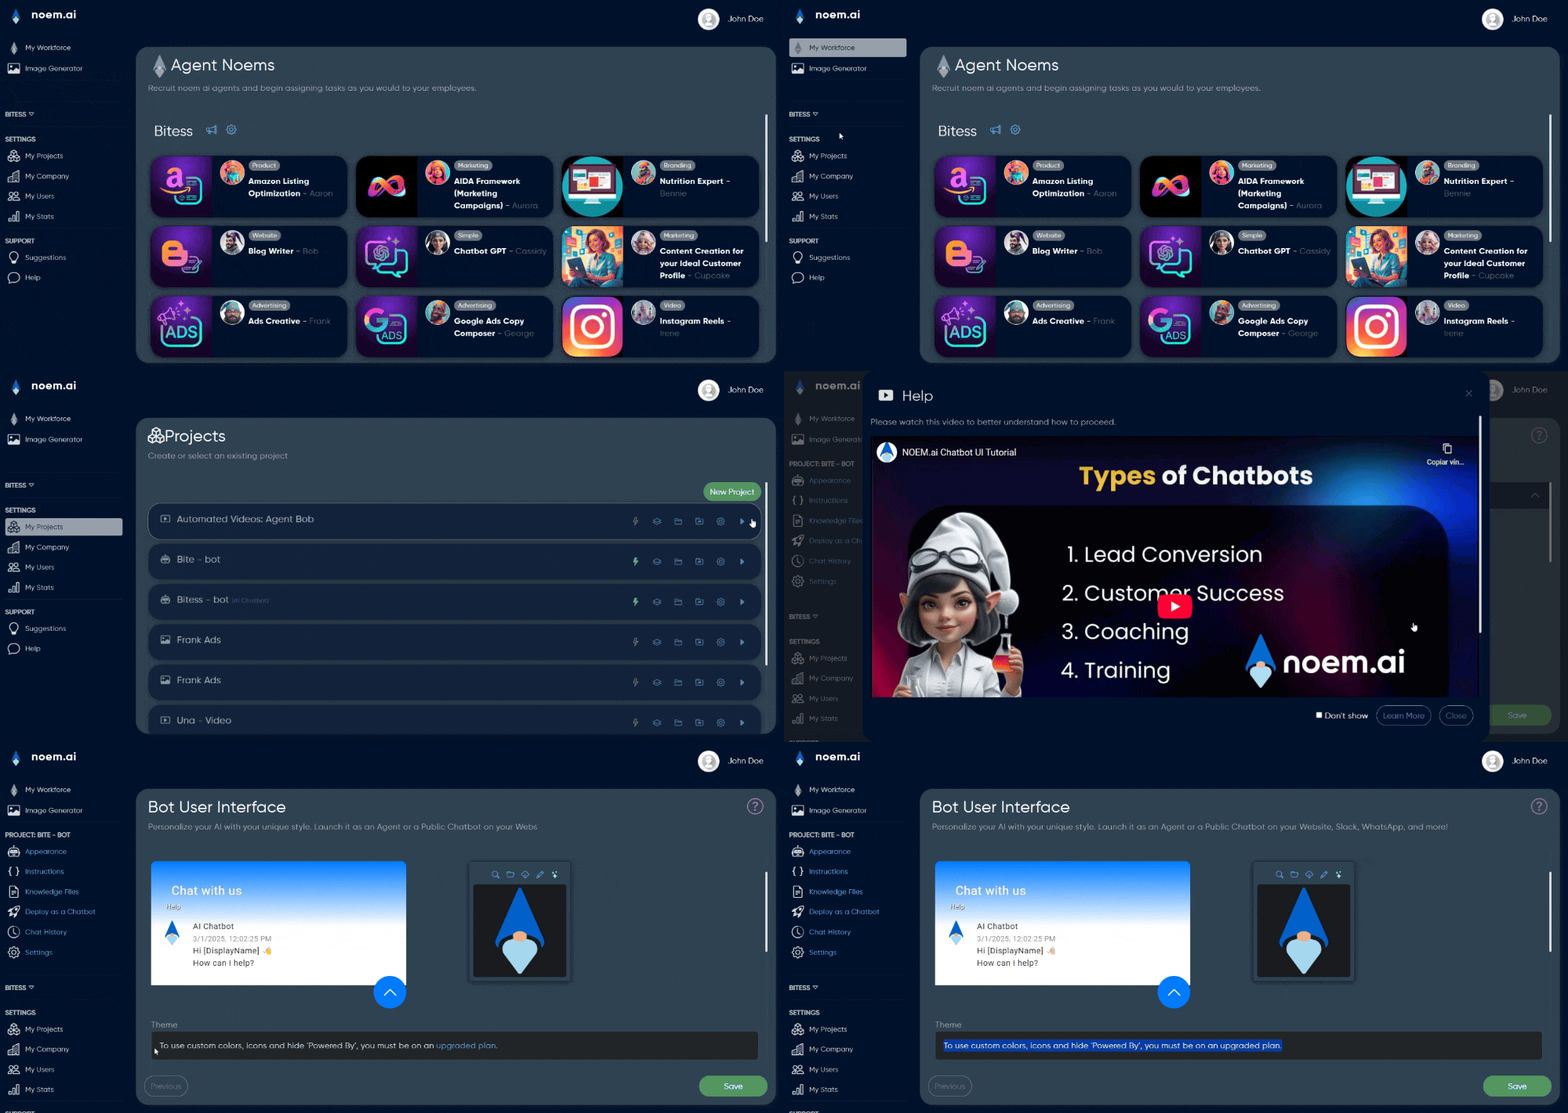
- Navigate to “My Projects” in Noem AI.
- Scroll down and click on “New Project.”
- Click on “Chatbot.”
This opens the custom chatbot creation section, where you can configure the chatbot’s role, instructions, and deployment settings.
Step 2: Configure the Chatbot’s Capabilities #
1. Choose a Chatbot Template #
Select from one of three pre-configured chatbot types:
- Customer Support Chatbot – Handles FAQs, customer inquiries, and issue resolution.
- Sales Representative Chatbot – Assists users in finding products, generating leads, and answering sales-related questions.
- Education Tutor Chatbot – Provides guidance, answers educational questions, and offers interactive learning.
Alternatively, you can skip templates and provide completely custom instructions tailored to your specific needs.
2. Define Chatbot Instructions #
- Outline the chatbot’s role, objectives, and response style.
- Set rules and guidelines for user interactions.
- Define responses for common queries and edge cases.
- Integrate advanced functionalities such as:
- Emailing
- Zendesk (available on Free Plan)
- Shopify (requires Individual Plan for advanced features)
- File Creation
- API Calling
- Trigger Browser Events
- Chat Thread Functions
Important: Advanced functions must only be enabled for custom agents. They are not supported in public chatbot deployments.
Step 3: Customize the User Interface #
1. Chat Window Settings #
- Bot Profile Picture – Upload an image to personalize your chatbot.
- Chat Window Header – Define the chatbot’s display name.
- Initial Welcome Message – Set an introductory message (supports HTML/Markdown).
2. Help Link (Optional) #
- Add a link to FAQs, documentation, or support resources.
3. Auto Engage Message #
- Define an automatic greeting for first-time interactions.
4. Sample Commands (Optional) #
- Predefine common user queries to guide conversations.
- Example: “What are your business hours?”
- Example: “Can you help me find a product?”
Step 4: Deploying and Integrating the Chatbot #
Once your chatbot is configured, deploy it on multiple platforms.
1. Deploy as a Public Chatbot #
- Test and deploy for public use.
Important: Advanced AI functions will not work properly in public chatbot deployments. Enable these features only for internal custom agents.
2. Website Integration #
- Generate a code snippet to embed the chatbot on your site.
htmlCopyEdit<script src="https://app.noem.ai/js/ChatBot.js"></script>
<script>
    let currentUser = {
        userId: null,
        displayName: 'user',
        profilePic: null,
        email: null
    };

    let nbOptions = {
        "disableCSS": false,
        "disableFabButton": false,
        "centered": false,
        "enableFileUpload": false,
        "enableToolbar": false,
        "enableTextToSpeech": false,
        "sendButtonText": "send",
        "stopButtonText": "send",
        "inputMessagePlaceHolderText": "Type your message here…"
    };

    const bot = new ChatBot('YOUR_API_KEY_HERE', currentUser, null, nbOptions);
    bot.init();
</script>
Replace 'YOUR_API_KEY_HERE' with your actual API key.
3. Approved Domains #
- Specify which domains are authorized to host your chatbot.
4. Google Tag Manager Integration #
- Noem AI automatically detects and logs chatbot events if Google Tag Manager is installed.
5. WordPress Integration #
- Install the Noem AI WordPress plugin.
- Upload via Plugins > Add New and activate.
- Insert your API Key into the settings.
6. Wix & SquareSpace Integration #
- Use the provided code snippet to embed chatbots on Wix and SquareSpace pages.
7. WhatsApp Integration #
- Create a WhatsApp application in Facebook Developers.
- Add a phone number, configure Webhook, and subscribe to message events.
- Copy your Access Token and Phone Number ID for API use.
- Test by messaging the registered number.
8. Slack Integration #
- Create a new app in Slack API.
- Enable Event Subscriptions and use the provided Request URL.
- Subscribe to the
message.imevent and enable the Message Tab. - Grant
chat:writepermissions and install the bot.
9. Shopify Integration #
- Requires at least an Individual Plan for advanced features.
- Integrate product catalog, order tracking, and customer engagement tools.
10. Let Noem AI Host Your Chatbot #
- Host and manage your chatbot directly on the Noem AI platform.
Step 5: Testing and Managing Your Chatbot #
1. Test the Latest Version #
- Use the Noem AI platform to test the chatbot before deployment.
2. Manage API Keys & Access Control #
- API keys are required for all third-party integrations.
- Manage keys securely within the dashboard.
3. Monitor & Improve Chatbot Performance #
- Review logs, refine responses, and continuously optimize chatbot behavior.
Build and Deploy Your AI Chatbot Today #
With Noem AI, businesses can create and deploy custom AI chatbots efficiently. Whether for support, sales, or education, the platform provides the tools necessary for full customization, integration, and management.
Get started now and bring AI-powered conversations to your business.


Leave a Reply
You must be logged in to post a comment.