


Table of Contents
Using the “Select” Option to Kickoff Your Project #
Introduction #
The “Project Toggle Menu – Select” option in noem.AI is your starting point for project creation, offering a range of customization choices based on your selected content type. Whether you are creating engaging videos, captivating images, insightful blogs, targeted emails, or visually appealing newsletters, the “Select” feature allows you to initiate and customize your project efficiently.
Accessing the “Project Toggle Menu – Select” Icon #
- Log in to Your noem.AI Account:
- Use your credentials to log in to your noem.AI account.
- Navigate to the “Projects” Dashboard:
- Go to the dashboard where your projects are listed.
- Select the Existing Project:
- Identify and select the project you want to work on.
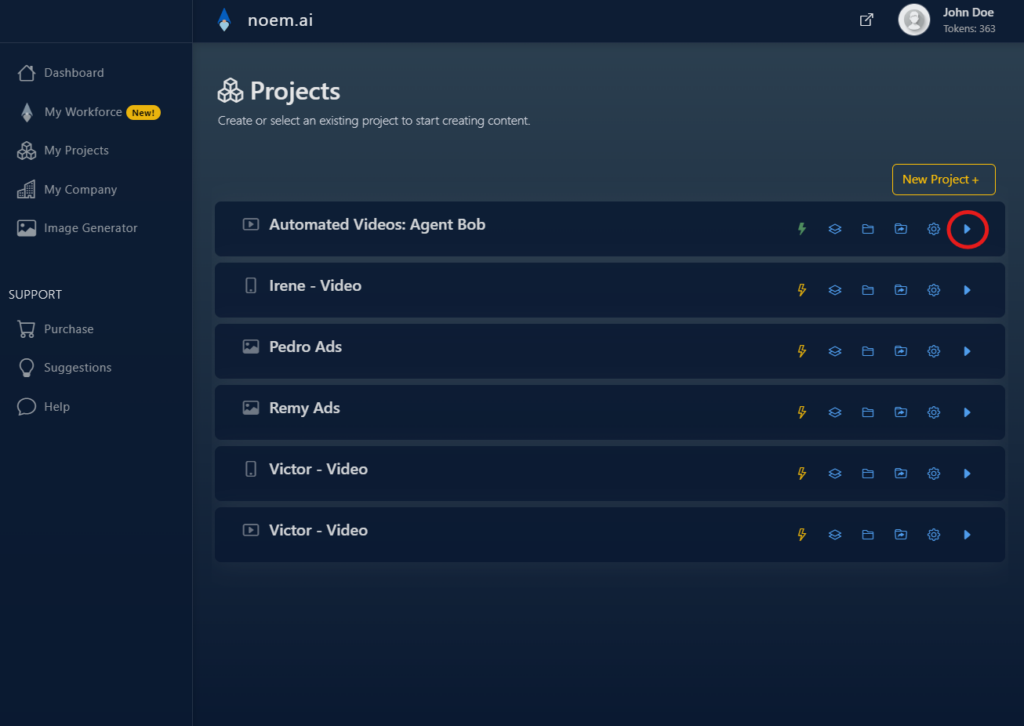
- Click the “Select” Button:
- Look for the “Select” button, usually represented by a “play” icon within your project toggle menu. This is where you initiate or continue your content creation process.
Choosing Topics and Video Scripts #
- For Video Content:
- Select relevant topics that align with your video’s theme or purpose.
- Choose a video script that suits your content goals, providing a foundation for your narrative.
- Pick the desired image styles, transition styles, voice, and music to complement your video.
Selecting Image Styles #
- For Image Content:
- Carefully choose the image style you want to generate. Consider themes, color schemes, or artistic styles that match your vision.
Crafting Thumbnails and Text #
- For Thumbnails:
- If your content involves thumbnails, select the thumbnail style that you want to use. Customize the appearance based on available options.
- For Blogs, Emails, or Newsletters:
- Craft text that resonates with your audience. Use trending topics or custom topics with the help of our AI tool to shape your written content.
Finalizing, Saving, and Posting #
- Review Your Selections:
- Ensure that all your selections and configurations align with your creative vision.
- Proceed to the Next Step:
- Click “Next” to move forward in the content creation process. Review the end result, tweak as needed, and proceed to posting.
- Link Social Media Accounts:
- Don’t forget to link your social media accounts for easier sharing and future project management.
Exploring Additional Customization (Optional) #
- Customize Further:
- Depending on your content type, explore additional customization options. This may include adjusting video settings, refining image parameters, or fine-tuning text elements.


Leave a Reply
You must be logged in to post a comment.