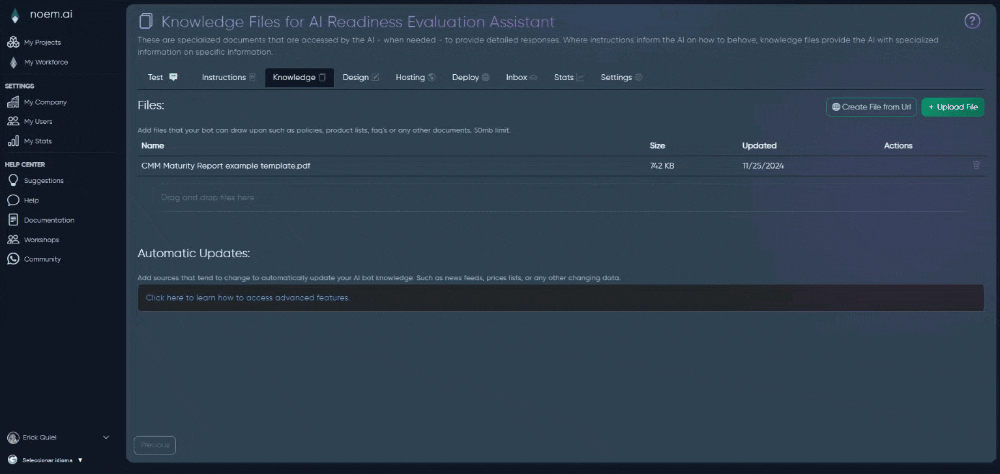
- 1) The Instructions editor: define behavior with clear guardrails
- 2) Templates vs custom instructions (how to use both)
- 3) Tools: Actions & Integrations (what your bot can DO)
- 4) How to make Tools actually work (tie them into your Instructions)
- 5) Book a call with an expert (the call button)
- 6) Save, test, and iterate (recommended workflow)
- Troubleshooting
The Instructions tab is the brain and rulebook of your chatbot. It controls how your bot behaves (tone, goals, boundaries) and—through Tools—what your bot is allowed to do (send emails, create tickets, trigger SMS/calls, fetch external data, run workflows, and more). If your chatbot ever feels inconsistent, “off brand,” or too generic, the fix almost always starts here.
1) The Instructions editor: define behavior with clear guardrails #
In the main panel you’ll see a rich-text editor. Treat this as your bot’s operating manual.
A proven instruction template (copy structure) #
Use this structure to get reliable performance:
A) Bot Identity
- Name
- Role
- Audience (who it helps)
B) Primary Goals (3–5 max)
- What outcomes the bot should optimize for
- What a “successful conversation” looks like
C) Tone & Style
- Writing style (short, direct, friendly, professional)
- Formatting rules (bullets, step-by-step, links first)
- Language rules (English only / bilingual, etc.)
D) Knowledge usage
- “Prefer Knowledge files over guessing.”
- “If info is missing, ask a clarifying question.”
E) Boundaries & safety
- Topics the bot should not handle
- Never request passwords or sensitive data
- What to do when the user asks something unsupported
F) Escalation rule
- When to hand off to a human or create a ticket
- What details to collect (name, email, phone, order ID)
Example (short but effective) #
- Role: You are “AIREA,” an AI Readiness Evaluation Assistant for business leaders.
- Goal: Assess AI readiness using the CMM framework and deliver a summary report + recommendations.
- Style: Ask one question at a time, summarize frequently, and use bullet points.
- If unsure: ask a clarifying question; do not invent details.
- Escalation: If the user wants implementation help, offer to book a call with an expert.
Common mistake: vague instructions #
“Be helpful” isn’t enough. Add “how” and “when” rules:
- “If the user asks for pricing, provide a short answer + next step.”
- “If the user asks for a demo, capture name/email and suggest booking.”
If you see “undefined” lines #
Remove them. They don’t help the bot and can confuse the instruction structure.
2) Templates vs custom instructions (how to use both) #
If your workspace supports templates, start with one when:
- you need a fast launch (support bot, SDR bot, Shopify bot)
- you want a proven baseline structure
Then customize:
- brand voice
- escalation conditions
- what data to capture
- which Tools are allowed
Tip: Avoid writing instructions that conflict with your enabled Tools. If Tools are enabled, tell the bot when to use them.
3) Tools: Actions & Integrations (what your bot can DO) #
Click Tools at the top of the editor to open Tools, Actions and Integrations. Each tool has a toggle on the right, turning it on grants permission for the bot to use it.

What each Tool is for (with real-world use cases) #
Email #
What it does: transitions complex chats to a human inbox or sends structured handoffs.
Use it for:
- “Contact support” requests
- sales lead handoff (“send this to my sales team”)
- internal notifications (“alert our ops team”)
Best practice: In Instructions, define what to include in the email:
- subject format
- summary + key user details
- the user’s request and urgency
Twilio (SMS & Call) #
What it does: triggers automated SMS and outbound calls.
Use it for:
- appointment confirmations
- “text me the details”
- outbound follow-ups after lead qualification
- urgent escalation workflows
Best practice: tell the bot what is allowed:
- when it can message/call
- what it can say
- what it should collect first (phone + consent)
Zendesk (may appear locked depending on plan) #
What it does: creates support tickets and attaches conversation context.
Use it for:
- “I need help” → auto ticket creation
- capturing structured ticket fields (issue type, urgency, account email)
- keeping a consistent support audit trail
Best practice: Define ticket rules in Instructions:
- when to create a ticket
- what details are required before creating one
- how the bot should confirm the ticket to the user
Shopify (may appear locked) #
What it does: helps with store operations such as product and order lookups.
Use it for:
- order status questions
- product availability and policies
- reducing pre-sales “basic questions” workload
Best practice: define what the bot should ask for:
- order number, email, shipping ZIP (depending on your workflow)
APIs / Webhooks (may appear locked) #
What it does: connects your chatbot to external systems via API/Webhooks, including automation platforms like Zapier or Make.
Use it for:
- CRM lead creation
- internal systems lookup (inventory, scheduling, account status)
- posting structured data into your workflows
Best practice: define which actions are allowed and what data to send.
Eventbrite #
What it does: fetches and displays live event listings.
Use it for: event calendars, ticketing questions, venue schedules.
Task Lists #
What it does: executes multi-step procedural workflows.
Use it for:
- onboarding checklists
- troubleshooting flows (“step 1…step 2…step 3…”)
- internal SOP-style assistants
Best practice: instruct the bot to:
- run one step at a time
- confirm completion before moving on
Trigger Browser Events #
What it does: controls website UI and frontend behaviors (open modals, prefill fields, trigger local actions).
Use it for:
- guided onboarding
- interactive lead capture (open a form automatically)
- dynamic product flows (“show pricing modal”)
Best practice: define safe triggers so the bot doesn’t spam UI actions.
Chat Thread Functions #
What it does: manages session context and chat logic (advanced thread behaviors).
Use it for:
- better session handling
- richer chat controls
- enhanced user experience flows

4) How to make Tools actually work (tie them into your Instructions) #
Turning on a tool is permission. You still need instruction triggers so the bot uses it correctly.
Add rules like:
- “If the user asks to speak with a human, create a Zendesk ticket and summarize the issue.”
- “If the user requests follow-up, ask for phone number and send an SMS via Twilio.”
- “If the user asks for a copy of this plan, email the summary.”
This is the difference between “tools enabled” and “tools used properly.”
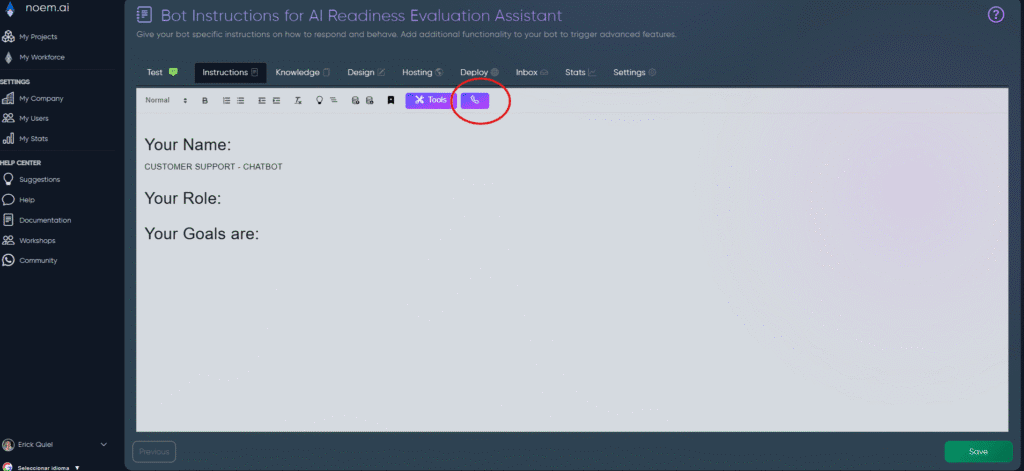
5) Book a call with an expert (the call button) #
Next to Tools, users can click the call button to book a call with an expert. This is recommended when:
- you want higher conversion rates (SDR flows)
- you need strict compliance or boundaries
- you’re enabling APIs/webhooks and want a clean workflow design
- you’re not sure how to structure the bot for a specific industry
What to bring to the call:
- your current Instructions
- 3 example conversations (good + bad)
- your desired success metric (reduce tickets, increase leads, bookings)
6) Save, test, and iterate (recommended workflow) #
- Write/adjust Instructions
- Enable only the Tools you need
- Save
- Test 5 scenarios:
- normal FAQ
- edge case / ambiguous question
- off-topic question
- escalation request (“human help”)
- tool trigger (“text me”, “create ticket”, “email this”)
Then refine:
- add missing clarifying questions
- tighten boundaries
- adjust escalation triggers
Troubleshooting #
- Tool is locked: likely requires a plan or permissions.
- Bot won’t trigger the tool: add explicit “when to use it” rules in Instructions.
- Conversation quality is inconsistent: reduce goals, add formatting rules, and force “ask clarifying questions” before acting.
- Random “undefined” text: delete it and re-save.


